
התאמת הקרבורטור כראוי היא אחת הדרכים האפקטיביות ביותר לשפר את ביצועי המנוע, את יעילות הדלק שלו ואת האמינות הכוללת שלו. בין אם אתם מתמודדים עם סיבובים לא יציבים במנוע במנוחה, תאוצה לקויה או צריכה מוגזמת של דלק – תהליך התאמת הקרבורטור כולל חיזוק עדין של תערובת האוויר-דלק כדי להשיג בעירה אופטימלית. קליברציה מדויקת זו דורשת הבנה של המנגנונים הבסיסיים ששולטים באספקת הדלק ובקליטת האוויר במערכת הקרבורטור של המנוע שלכם.
תהליך התאמת המזרק משפיע ישירות על ביצועי המנוע על ידי בקרה על היחס המדויק של אוויר ודלק הנכנסים לתא الاحتراق. כאשר מוזן כראוי, המזרק מבטיח בעריכה מלאה של הדלק, מקסם את פליטת הכוח, מפחית את הפליטות ומנע נזק למנוע כתוצאה מהפעלה עתירת דלק או עתירת אוויר. הבנת הדרך השיטתית להתאמת המזרק מעניקה לכם את היכולת לאבחן בעיות בביצועים ולממש את התאמות הדרושות לפעולת המנוע האופטימלית.
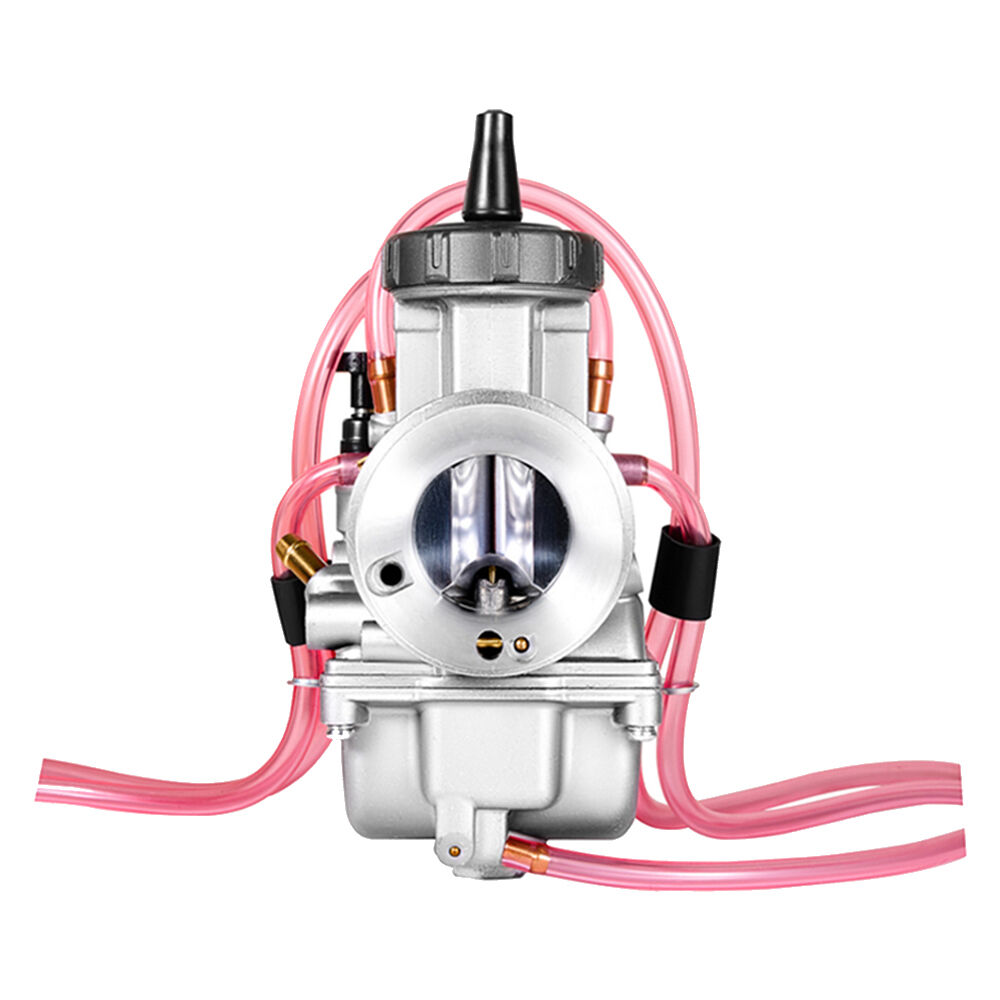
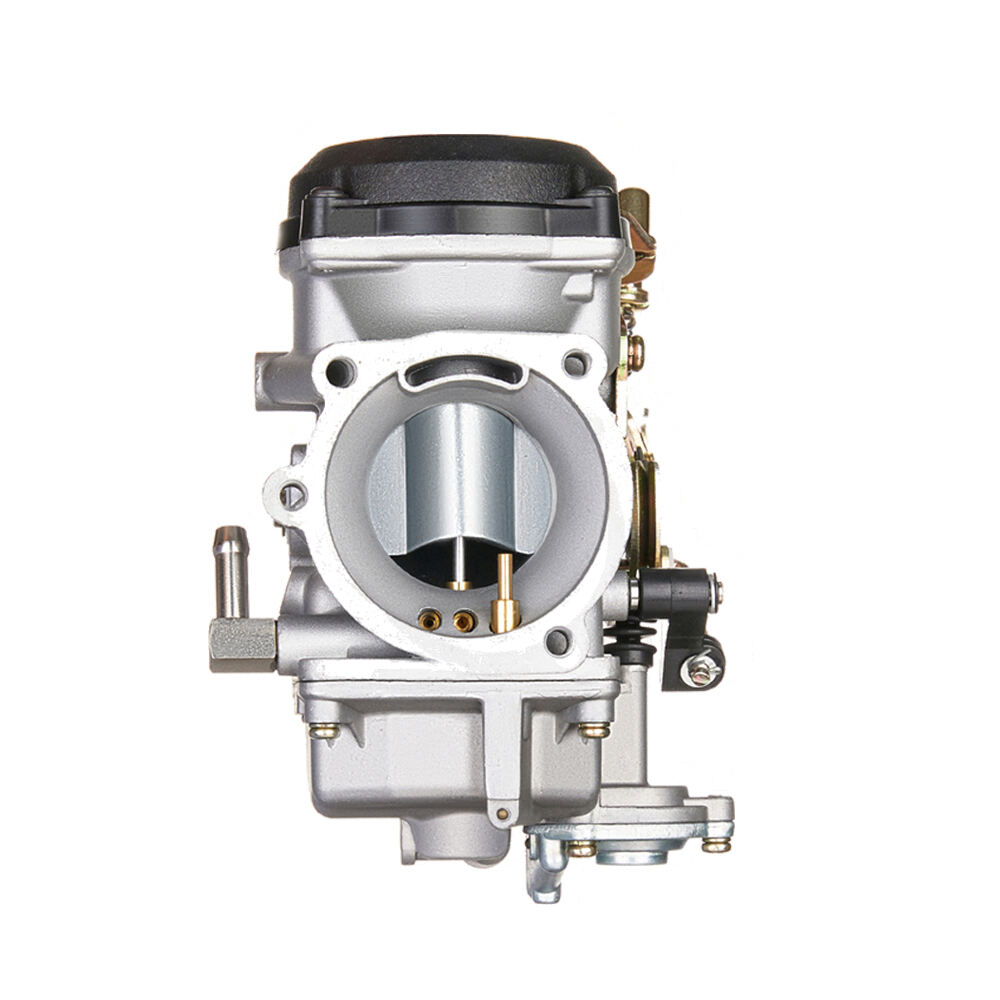
הבנת רכיבי המזרק והתפקיד שלהם בביצועים
ברגים עיקריים להתאמה והפונקציות שלהם
נקודות התאמה הראשיות של המניע כוללות את ברג הער mieszת הסיבוב האיטי, ברג מהירות הסיבוב האיטי, וקבוצת הזרקן הראשית. ברג ערבוב הסיבוב האיטי שולט ביחס האוויר לדלק במהירויות סיבוב איטיות, ומשפיע ישירות על רמת ההחלקה שבה המנוע פועל כאשר הוא עומד במקום. לברג זה דרושה בדרך כלל התאמה כאשר המנוע פועל באיטיות באופן לא חלק, כבה לעיתים תכופות, או מפיק פליטות מיותרות דרך צינור הפליטה במהלך פעולת הסיבוב האיטי.
ברג מהירות הסיבוב האיטי קובע את מהירות הסיבוב (RPM) של המנוע במצב סיבוב איטי, ופועל בשיתוף עם מיקום לוחית התריס. התאמת מהירות הסיבוב האיטי הנכונה מבטיחה שהמנוע ימשיך לפעול באופן עקבי ללא כיבוי, ובו זמנית מונעת מהירות סיבוב איטי גבוהה מדי שמבזבזת דלק. ברוב מערכות המניע נדרשת מהירות סיבוב איטי בתחום של 600–900 RPM כדי להשיג ביצועים אופטימליים.
המכלול של הזרבובית הראשית מנהל את אספקת הדלק במהלך האצה ותנאי עומס גבוה. בניגוד להתאמות מעגל ההפעלה במנוחה, שינויים בזרבובית הראשית דורשים בדרך כלל החלפת רכיבים פיזיים ולא התאמות באמצעות ברגים. עם זאת, חלק מהעיצובים של המבער כוללים ברגי תערובת ראשיים ניתנים להתאמה שמאפשרים דקיקת ערכת אספקת הדלק הראשית.
מערכת ש floatValue ובקרת רמת הדלק
המנגנון הצף בתוך המבער שלכם שומר על רמות הדלק הקבועות באגן הציפה, ומבטיח אספקת דלק אמינה בכל תנאי הפעלה. התאמת הציפה הנכונה מונעת חוסר דלק במהלך האצה ומונעת מצבים של גלישה (overflow) שגורמים לריצה עשירה וביצועים לקויים. גובה הציפה משפיע ישירות על זמינות הדלק גם למעגל ההפעלה במנוחה וגם למעגל הדלק הראשי.
התאמת הציפה מתבצעת על ידי עקיצת זרוע הציפה כדי להשיג את גובה רמת הדלק המצוין. יצרני קרבורטורים מרביתם מציינים רמות ציפה בטווח של 6–8 מ"מ מתחת לשפת קערת הציפה, אם כי המידות המדויקות משתנות בהתאם למודל. רמות ציפה לא תקינות גורמות להספק דלק לא אחיד, מה שמשפיע הן על איכות ההפעלה במנוחה והן על הביצועים במהירויות גבוהות.
תחזוקת מערכת הציפה הרגילה כוללת בדיקה לזיהום הדלק, אימות של שלמות הציפה ווידוא שהשסתום המחט נסגר כראוי. ציפה פגומה או שסתום מחט משומש פוגעים בשליטה ברמת הדלק, מה שהופך את התאמה של הקרבורטור ללא אפקטיבית עד שנקבעו ויפתרו הבעיות היסודיות הללו.
סדרת השלבים לתאום קרבורטור
הגדרה ראשונית והכנת המנוע
לפני תחילת התאמות המניע, ודאו שהמנוע הגיע לטמפרטורת הפעלה נורמלית וכל המערכות הקשורות פועלות כראוי. מסנן אוויר נקי, זמן הצתה תקין וספקי דלק מספקים הם דרישות מוקדמות לתיאום יעיל של המניע. כל בעיה מכנית קיימת תפריע לדיוק ההתאמות ולא תאפשר שיפור ביצועים אופטימלי.
התחלו את תהליך ההתאמה עם שני ברגי התערובת במצב הבסיסי שלהם, בדרך כלל 1.5 עד 2 סיבובים החוצה מהמצב שבו הם נוגעים ברכס באופן קל. נקודת ההתחלה הזו מספקת תערובת אויר-דלק סבירה עבור רוב המנועים, תוך כדי אפשרות להתאים גם בכיוון ההגבהה וגם בכיוון ההנמכה בהתאם לדרישות הביצועים. רשמו את מיקומי ההתחלה שלכם כדי לאפשר חזרה מהירה להגדרות הבסיסיות אם יש צורך.
ודאו שהחיבר של דופק הפעלה פועל חלק ומחזיר את המנוע למצב מנוחה באופן עקבי. חיכוך או הדבקות בפעולת דופק הפעלה יפריעו להתאמת מהירות המנוחה המדויקת ויוכלו ליצור סיכונים לביטחון במהלך תהליך ההתאמה.
סדר התאמת תערובת המנוחה ומהירות המנוחה
התחל את סדר ההתאמה על ידי הגדרת בורג מהירות המנוחה כדי להשיג כ־100 סל"ד מעל למהירות המנוחה הרצויה. נקודת ההתחלה הזו מעט גבוהה יותר מספקת שדה התאמה תוך כדי הבטחת פעולת המנוע ללא הפסקה לאורך תהליך התאמת התערובת. השתמשו בתאכומטר מדוייק כדי לעקוב אחר השינויים במהירות הסיבוב (סל"ד) במהלך ההתאמה.
התאם את ברג המיקסום במנוחה צעד אחר צעד, סובב בכיוון השעון כדי ללחוץ את המיקסום או נגד כיוון השעון כדי לעשיר אותו. הקש על שינויים בהחלקת המנוע וצפית בשינויי ה-RPM בעת ביצוע התאמות. הגדרת המיקסום האופטימלית מובילה בדרך כלל ל-RPM היציב הגבוה ביותר ולתפעול חלק ביותר של המנוע במצב מנוחה.
לאחר שהשגת את הגדרת המינון האופטימלית במצב מנוחה, התאם מחדש את ברג מהירות המנוחה כדי להגיע למהירות הסיבוב המבוקשת (RPM). האינטראקציה בין התאמות המינון ומהירות דורשת לעיתים קרובות מספר חזרות כדי להשיג תוצאות אופטימליות. בצע התאמות קטנות והמתן להתייצבות המנוע בין כל שינוי כדי להעריך بدقة את ההשפעה של כל שינוי.
התאמת דיוק לתנאי פעילות שונים
בדקו את התאמות המזרק בתנאי פעולה שונים כדי להבטיח ביצועים עקביים בכל טווח הפעולה של המנוע. העלו בהדרגה את מהירות המנוע מהחנייה כדי לאמת תאוצה חלקה ללא השהייה או נדידה. תופעות אלו מצביעות על הגדרות תערובת שגויות הדורשות התאמה נוספת.
בצעו מבחני תאוצה על ידי פתיחת חלון התריס במהירות תוך מעקב אחר תגובת המנוע. התאמה נכונה של המזרק אמורה לייצר תאוצה מיידית וחלקת, ללא פיצוצים לאחור, השהייה או עשן מוגזם דרך צינור הפליטה. עשן שחור מצביע על תערובת עשירה, בעוד שתערובות דלות גורמות בדרך כלל להשהיה או לפיצוצים לאחור במהלך התאוצה.
אמתו את פעולת המהירויות הגבוהות על ידי הפעלת המנוע במגוון מיקומים של חלון התריס ומעקב אחר יציבות הביצועים. ה קרבורטור מזרק
הכרת בעיות ביצוע נפוצות
תסמינים ופתרונות לתערובת עשירה
תנאי תערובת עשירה מתגלים באמצעות מספר תסמינים נצפים, כולל עישון שחור דרך פליטה, יעילות דלק נמוכה, פעולת סיבוב לא יציבה במנוע במנוחה, וצמיחה של פחמן על מבעירי הבוכנה. תנאים אלו מתרחשים כאשר המזרק מספק כמות דלק מופרזת ביחס לכמות האוויר הזמינה, מה שגורם לבעירה לא שלמה ולירידה ביעילות המנוע.
התיקון של בעיות תערובת עשירה כולל בדרך כלל סיבוב ברגלי התערובת בכיוון השעון כדי להפחית את ספירת הדלק או להגביר את זרימת האוויר. עם זאת, תנאים קיצוניים של תערובת עשירה עלולים לרמז על בעיות בסיסיות כגון רמות ציפה לא נכונות, שסתומים מחוסלים, או חורים גדולים מדי שדורשים החלפת רכיבים ולא רק התאמות פשוטות.
גורמים סביבתיים כגון גובה מעל פני הים, טמפרטורה ורطיבות משפיעים על הגדרות התערובת האופטימליות. מנועים העובדים בגבהים גבוהים דורשים הגדרות תערובת דקיקות יותר בשל צפיפות האוויר הנמוכה, בעוד שטמפרטורות נמוכות עלולות לדרוש תערובות מעט עשירות יותר כדי להבטיח הפעלה אמינה ותהליך חימום תקין.
מצביעים על תערובת דלילה ותיקונים
תנאי תערובת דלילה מתבטאים בอาการ כגון נחיתות מנוע, התפוצצות לאחור, חימום יתר ותגובה לקויה של המנוע להאצה. תערובות דלילות מתרחשות כאשר כמות הדלק הנמסכת היא בלתי מספקת יחסית לכמות האוויר, מה שגורם לבעירה לא שלמה ולנזק פוטנציאלי למנוע עקב טמפרטורות בעירה גבוהות מדי.
לפתור בעיות תערובת דלילה על ידי סיבוב ברגי התערובת נגד כיוון השעון כדי להגביר את מסירת הדלק. יש לפקח בקפידה על טמפרטורת המנוע בעת תיקון תנאים דלילים, מאחר שהפעלה ממושכת עם דלק בלתי מספיק עלולה לגרום לנזקים חמורים למנוע, כולל שריפת שסתומים, נזק לפיסטונים ועקמומיות ראש 실ינדר.
לאשר כי הסימפטומים של תערובת דלילה אינם נגרמים על ידי מגבלות בהספקת הדלק, כגון גללים סדוקים, מסנני דלק מלוכלכים או לחץ דלק בלתי מספיק של משאבת הדלק. יש לפתור בעיות בסיסיות אלו לפני התאמת המבקר, כדי שתיקון התערובת יהיה אפקטיבי ולשחזר את הביצועים האופטימליים של המנוע.
טכניקות Настройка מתקדמות ליצירת ביצועים מרביים
אופטימיזציה של התערובת בהתבסס על עומס
התאמת קרבורטור מתקדמת כוללת אופטימיזציה של הגדרות התערובת עבור תנאי עומס ספציפיים, ולא שימוש בהגדרה אחת שמהווה פשרה. גישה זו דורשת הבנה כיצד עומס המנוע משפיע על דרישות הדלק ותאום הקרבורטור בהתאם. יישומים שונים עשויים להפיק תועלת מהגדרות תערובת מעט שונות, בהתאם לתנאי הפעלה הטיפוסיים.
יישומים בעלי ביצועים גבוהים דורשים לעיתים קרובות הגדרות תערובת עשירות יותר במהלך האצה והגדרות דקיקות יותר בתנאי נסיעה מתמדת. חלק מעיצובי הקרבורטורים כולל מעגלים מרובים להתאמה, המאפשרים התאמה עצמאית של טווחי הפעלה שונים. הבנת האינטראקציות בין המעגלים הללו מאפשרת אופטימיזציה מדויקת יותר של הביצועים.
לנתח את טמפרטורת גז הפליטה ואת מצב הבוכנות כדי לאשר הגדרות אופטימליות של התערובת בתנאי עומס שונים. מדדים אלו מספקים משוב אובייקטיבי באיכות הבעירה ועוזרים לזהות הגדרות תערובת שמקסמות את הספק הכוח תוך שמירה על אמינות המנוע.
אסטרטגיות לפיצוי סביבתי
שינויים עונתיים וסביבתיים מחייבים התאמות מחודשות של הקרבורטור במרווחי זמן קבועים כדי לשמור על ביצועים אופטימליים. שינויים בטמפרטורה משפיעים על צפיפות האוויר והחומרת של הדלק, בעוד ששינויים ברhumidity משפיעים על מאפייני הבעירה. תיעוד דרישות ההתאמה העונתיות עוזר לקבוע לוחות זמנים לתחזוקה לשם ביצוע עקבי.
השתנות בגובה משפיעה באופן משמעותי על ביצועי המניעת вследствие שינויים בצפיפות האוויר. מנועים שעוברים לגבהים גבוהים יותר דורשים בדרך כלל הגדרות תערובת דקיקות יותר, בעוד שיורדים לגבהים נמוכים יותר עלול להצריך התאמות עשירות יותר. הבנת הקשרים הללו מאפשרת התאמה מהירה לסביבות פעילות משתנות.
שקלו התקנת מכשירי התייחסות לגובה או מערכות מניעת מתואמות אם המנוע שלכם פועל במגוון רחב של גבהים. התאמות אלו מכווננות אוטומטית את הגדרות התערובת בהתאם לתנאי האטמוספירה, ומשמרות ביצועים אופטימליים ללא התערבות ידנית.
שאלות נפוצות
באיזו תדירות יש להתאים את המניעת כדי להשיג ביצועים אופטימליים?
התאמות המניע должны להיבדק מדי עונה או בכל פעם שתשימו לב לשינויים בביצועים, כגון סיבוב לא יציב במנוע, تسارع לקוי או צריכה מוגברת של דלק. לרוב המנועים נדרשות התאמות קלות 2–3 פעמים בשנה כדי לפצות על שינויים בעונה, בטמפרטורה ובלחות. עם זאת, אם המנוע שלכם פועל באופן עקבי וטוב, יש להימנע מהתאמות מיותרות שעשויות לפגוע בהגדרות האופטימליות.
אילו כלים נדרשים לי כדי להתאים את המניע כראוי?
כלי התאמה חיוניים למדחס כוללים טאكومטר אמינה למדידת סיבובים לדקה (RPM), מברגים מתאימים להתאמת תערובת ומהירות, וכלים ידניים בסיסיים לגישה לנקודות ההתאמה. מד ריקוד עוזר באבחון מצב התערובת, בעוד שמנתח גזות הפליטה מספק משוב מדויק על התערובת. את רוב התאמות הבסיסיות ניתן לבצע בכלים רגילים של המוסך ובעזרת תשומת לב קפדנית להתנהגות המנוע.
האם אפשר לפגוע במנוע על ידי התאמת שגויה של המניע?
כן, התאמות קרבורטור חסרות-תוקף יכולות לגרום לפגיעת מנוע, במיוחד בתנאי תערובת דלילה שמייצרים טמפרטורות בעירה מופרזות. תערובות עשירות גורמות בדרך כלל לבעיות ביצועים ולעלייה בפליטות, אך פחות סביר שיגרמו לפגיעת מנוע מיידית. יש לבצע התאמות קטנות בלבד, צעד אחר צעד, ולפקח בזהירות על התנהגות המנוע כדי להימנע מתנאי הפעלה מסוכנים.
למה יש לי להתאים מחדש את הקרבורטור לאחר ניקוי או שיקום?
ניקוי או שיקום קרבורטור משנים לעתים קרובות את הרווחים הפנימיים, את רמות הציפה ואת הקשרים בין הרכיבים, מה שמשפיע על משלוח התערובת. אטמים חדשים, חתיכות אטימה ורכיבים קליברטיים עשויים לדרוש הגדרות התאמה שונות מאלו של הتكوين הקודם. בנוסף, הניקוי מסיר שאריות דלק שיכלו לפצות על רכיבים משומשים, ולכן נדרשת קליברציה חדשה כדי להשיג ביצועים אופטימליים.