
 EN
EN
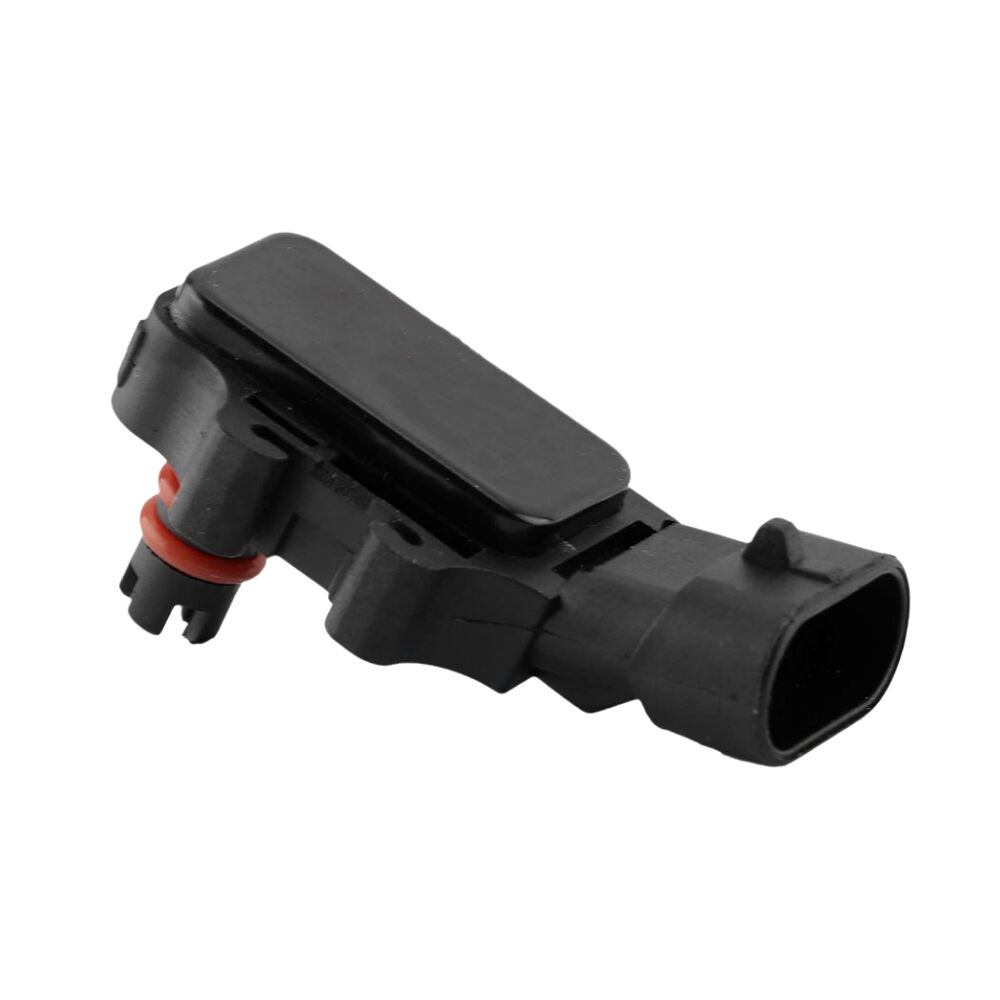
A faulty map sensor is one of the most misdiagnosed problems in modern fuel-injected motorcycles. The manifold absolute pressure sensor plays a central role in engine management, quietly feeding real-time pressure data to the ECU so it can calculate the correct air-fuel mixture for every riding condition. When this small but critical component begins to fail, the consequences ripple outward into fuel economy, throttle response, idle stability, and cold-start performance. Understanding how to identify, diagnose, and resolve map sensor problems is essential knowledge for any serious rider, mechanic, or fleet maintenance professional.
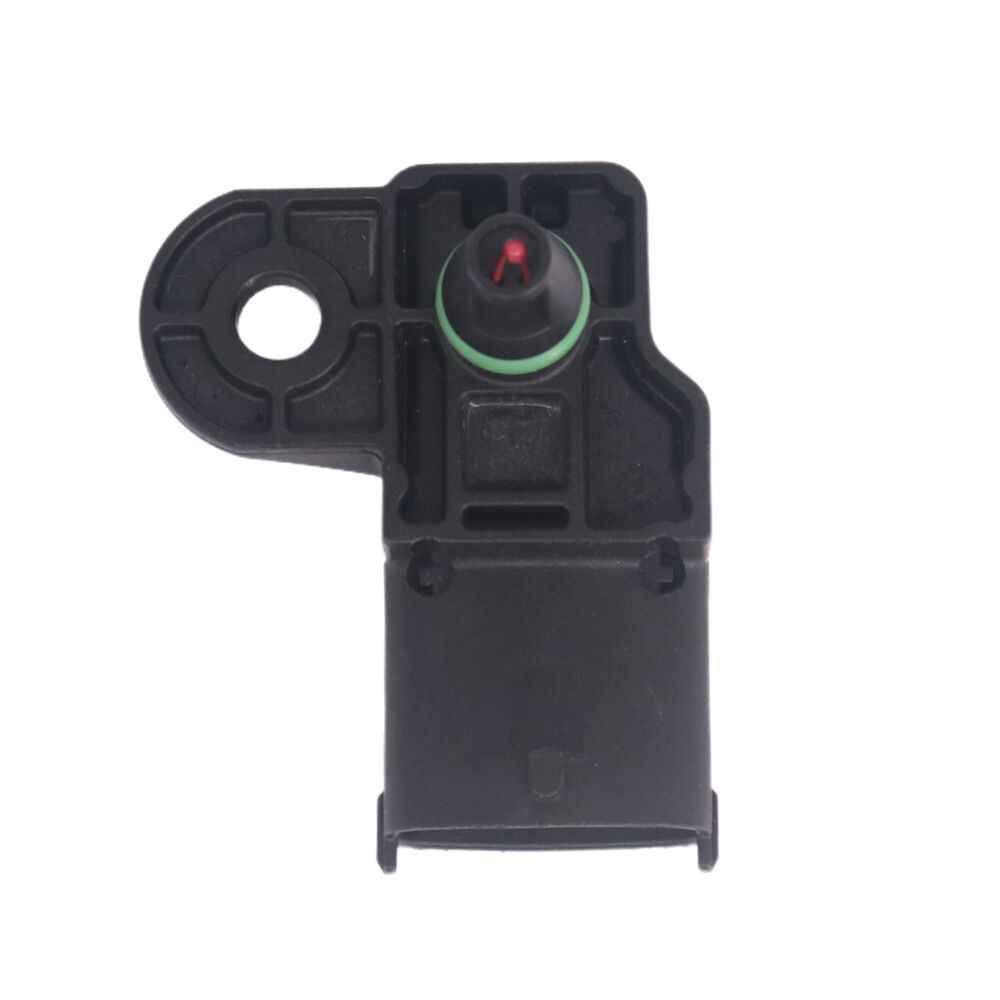
This guide is built around the most common problems riders and technicians encounter with the motorcycle map sensor, along with practical, step-by-step solutions grounded in real diagnostic logic. Whether you are dealing with a sudden check-engine light, persistent rough idling, or unexplained power loss, the information here will help you isolate the root cause efficiently and make sound repair decisions. We cover symptom recognition, electrical testing, vacuum integrity checks, sensor replacement considerations, and preventive maintenance — giving you a complete troubleshooting framework rather than scattered tips.
Understanding What the MAP Sensor Does in a Motorcycle Engine
The Pressure-to-Signal Conversion Process
The map sensor measures the absolute pressure inside the intake manifold and converts that value into a voltage signal that the engine control unit interprets continuously. Unlike a traditional vacuum sensor that reads relative pressure, the map sensor reads absolute pressure — meaning it accounts for atmospheric pressure at different altitudes. This makes it far more accurate for modern fuel injection systems that need to adapt to varying environmental conditions without manual recalibration.
At idle, manifold pressure is low because the throttle is nearly closed and the engine creates strong vacuum. During wide-open throttle, pressure rises sharply as air rushes in. The map sensor captures this full spectrum of pressure values and translates them into a proportional voltage, typically ranging between 0.5 volts and 4.5 volts depending on the sensor design and operating range. The ECU uses this voltage alongside inputs from the throttle position sensor, coolant temperature sensor, and crankshaft position sensor to build a complete picture of engine load.
When the map sensor output is inaccurate or missing, the ECU either defaults to a pre-programmed limp-home map or makes injector timing decisions based on corrupted data. Either outcome degrades performance and can cause long-term engine stress if left unaddressed.
How MAP Sensor Data Influences Fueling Decisions
Fuel injection timing and duration are directly influenced by the load signal produced by the map sensor. When the sensor correctly reports low manifold pressure, the ECU reduces fuel delivery because the engine is not under heavy demand. When pressure rises under acceleration, the ECU enriches the mixture to match the increased airflow entering the combustion chamber. This feedback loop happens hundreds of times per second, making the map sensor one of the most actively used inputs in the system.
A map sensor that drifts high — reporting more pressure than actually exists — tricks the ECU into delivering excess fuel. The result is a rich condition with black smoke, fouled spark plugs, and reduced fuel economy. A sensor that drifts low reports less pressure than reality, causing the ECU to lean out the mixture, increasing combustion temperatures and creating a real risk of piston or valve damage under load. Neither condition is trivial, which is why early detection matters enormously.
Common Symptoms Indicating a Failing MAP Sensor
Rough Idle and Unstable Engine Behavior
One of the earliest and most consistent signs of a deteriorating map sensor is an erratic or rough idle. When the sensor produces unstable voltage output at low manifold pressure conditions, the ECU receives conflicting load signals within milliseconds of each other. This causes the injectors to pulse irregularly, creating a characteristic hunting idle where engine RPM oscillates up and down without any throttle input from the rider.
This symptom is often confused with a dirty fuel injector or a vacuum leak, which is why systematic diagnosis is so important. The rough idle from a failing map sensor tends to smooth out temporarily under load because sensor errors become proportionally smaller relative to the higher pressure values at elevated RPM. If the idle issue disappears once the engine warms up or is given light throttle but returns each time the bike returns to idle, the map sensor should be near the top of your diagnostic checklist.
Cold starts are particularly vulnerable because the ECU relies heavily on the map sensor during the initial fuel enrichment phase. A sensor producing inconsistent readings during warm-up will cause stumbling, stalling, or the need for repeated restart attempts in cold ambient conditions.
Poor Fuel Economy and Rich or Lean Running Conditions
A sudden and unexplained drop in fuel economy is a reliable indicator that the map sensor may be sending incorrect pressure data to the ECU. If the sensor skews toward reporting higher-than-actual manifold pressure, the fuel system runs rich continuously. Riders notice the smell of unburned fuel, see dark exhaust emissions, and find that fuel consumption increases noticeably even without changes to riding style or load.
Conversely, a sensor reporting lower-than-actual pressure causes the engine to run lean. In mild cases, this appears as hesitation under acceleration, reduced pulling power at high RPM, or a tendency for the engine to feel 'flat' through the mid-range. In more severe cases, persistent lean running can cause engine knocking, overheating, and accelerated wear on piston rings and cylinder walls.
Both rich and lean conditions linked to the map sensor usually trigger fault codes in the ECU, most commonly in the P0105 through P0109 range. However, intermittent sensor faults do not always generate stored codes immediately, making live data monitoring with a diagnostic scanner a more reliable technique than relying solely on fault code memory.
Check Engine Light and Diagnostic Fault Codes
The check engine light is one of the more direct signals that the map sensor has moved outside its expected operating parameters. Modern motorcycle ECUs monitor the map sensor's voltage output against expected ranges for each throttle position and engine speed. When the actual output falls outside those programmed tolerance windows — even briefly — the ECU logs a fault and illuminates the warning indicator.
Reading these codes with an OBD diagnostic tool gives you a starting point, but it should never be the endpoint of your diagnosis. A fault code referencing the map sensor confirms the ECU has seen an anomaly in that circuit, but it does not automatically confirm the sensor itself is defective. The same code can be triggered by a broken wire in the sensor harness, a corroded connector, a pinched vacuum hose, or even a software glitch in some ECU variants. Always treat the fault code as a direction, not a verdict.
Step-by-Step Diagnostic Process for MAP Sensor Problems
Visual Inspection and Vacuum Line Check
Before reaching for a multimeter or diagnostic scanner, begin every map sensor diagnosis with a thorough visual inspection. The sensor is typically mounted on the intake manifold or on the airbox, depending on the motorcycle model. Check the sensor body for cracks, impact damage, or discoloration from heat exposure. Even a hairline crack in the sensor housing can allow atmospheric air to enter, invalidating the pressure reading at all operating conditions.
Inspect the vacuum hose that connects the map sensor to the intake manifold. This hose is a common failure point because it is subjected to constant heat cycling and vibration. Look for cracks, brittleness, kinks, or sections where the hose has pulled partially off its fitting. A vacuum leak here will cause the map sensor to always read near atmospheric pressure regardless of actual manifold conditions, producing a permanently lean ECU response. Pinch the hose temporarily while the engine idles — if idle quality changes noticeably, the hose is likely leaking.
Also inspect the electrical connector at the map sensor. Corrosion on the connector pins is a frequent cause of intermittent sensor faults in motorcycles exposed to rain, humidity, or road salt. Use electrical contact cleaner and a fine pin probe to clean and test connector continuity before condemning the sensor itself.
Electrical Testing with a Multimeter
Electrical testing of the map sensor provides concrete data about whether the sensor circuit is functioning within specification. With the ignition key turned to the on position but the engine not running, use a multimeter set to DC voltage. Probe the reference voltage wire — typically the 5-volt supply from the ECU — and confirm the sensor is receiving the correct reference. A reading significantly below 4.8 volts suggests a supply voltage problem on the ECU side rather than a sensor fault.
Next, probe the signal output wire while the engine is running at idle. Compare the reading against the manufacturer specification for idle manifold pressure at your altitude. At sea level with a warm engine at idle, a typical map sensor should output approximately 1.0 to 1.5 volts. Snap the throttle open briefly and watch whether the voltage rises proportionally and returns cleanly to the idle value. A signal that lags, spikes erratically, or fails to return to baseline suggests internal sensor degradation.
Ground circuit integrity is equally important. Probe between the sensor ground pin and a known clean chassis ground. Any resistance above 0.5 ohms in the ground circuit can corrupt the signal output and produce false fault codes related to the map sensor. A clean ground is the foundation of accurate sensor performance, and this check is frequently overlooked.
Live Data Monitoring and Comparison Testing
Live data monitoring through an OBD scanner provides the most comprehensive view of map sensor behavior under real operating conditions. Connect a compatible diagnostic tool and navigate to the live sensor data stream. Observe the manifold pressure value at idle, at 2000 RPM, at 4000 RPM, and during deceleration. Compare these values against known-good reference data for the same engine and altitude level.
During deceleration with the throttle closed, manifold pressure should drop sharply because the engine is pumping against a nearly closed throttle — this creates high vacuum, which appears as low absolute pressure on the map sensor reading. If the sensor reports high pressure or shows no change during deceleration, the sensor is not responding correctly to manifold conditions. This comparison test is one of the most reliable ways to distinguish a genuinely defective map sensor from a vacuum line issue or wiring fault.
If access to a second identical sensor is available, substitution testing is the definitive confirmation method. Temporarily install a known-good map sensor of the same part number and repeat the live data comparison. If behavior normalizes immediately, the original sensor is confirmed faulty. Always clear stored fault codes after substitution to allow the ECU to re-evaluate with the new sensor installed.
Replacing and Selecting the Right MAP Sensor
Choosing a Compatible Replacement Sensor
Selecting the correct replacement map sensor requires more than matching the physical connector. The sensor must match the pressure range, signal output curve, and reference voltage specification of the original unit. Using a sensor with a different pressure range — even one that physically fits — will cause the ECU to misinterpret the voltage output as incorrect pressure values, reintroducing the same symptoms the replacement was meant to fix.
For motorcycles equipped with Delphi EFI systems, sourcing an OEM-grade or OEM-equivalent replacement ensures direct compatibility without ECU recalibration. The map sensor designed for Delphi EFI systems offers precise pressure sensing characteristics matched to the original factory specification, making it a practical choice for technicians seeking a reliable direct replacement without calibration complexity.
Always verify the part number against the motorcycle's OEM parts diagram before purchase. Some engine families used multiple sensor variants across production years with different connector types or updated calibration curves. Installing the wrong variant within the same engine family can produce subtle fueling errors that are difficult to diagnose without detailed specification knowledge.
Installation Best Practices and Post-Replacement Verification
Installation of a replacement map sensor is straightforward but requires attention to a few critical details. Before removing the old sensor, label the vacuum hose and electrical connector to prevent incorrect reassembly. Clean the mounting port on the intake manifold with a lint-free cloth to remove any debris that could compromise the sensor's sealed contact. If the sensor uses a threaded mount, apply the specified torque — over-tightening can crack the sensor body or strip the intake manifold threads.
After installation, reconnect the vacuum hose and verify it seats fully onto both the sensor fitting and the manifold port. Inspect the electrical connector until it clicks positively into the locked position. A partially seated connector is a common source of post-replacement problems that mimic sensor failure. Clear all stored fault codes from the ECU memory before starting the engine to give the system a clean baseline with the new sensor in place.
Start the engine and allow it to reach full operating temperature. Use a diagnostic scanner to monitor the map sensor output in live data mode throughout the warm-up cycle. Confirm that idle manifold pressure readings are stable and within specification, that the signal responds correctly to throttle inputs, and that no new fault codes appear after a full warm-up cycle and short test ride. This post-replacement verification step prevents the frustration of an apparent repair that fails to resolve the root problem.
Preventive Maintenance to Extend MAP Sensor Life
Protecting the Sensor from Environmental Damage
The map sensor is a precision electronic component that performs best when protected from the harshest elements of the motorcycle's operating environment. Heat is one of the primary aging factors. Sensors mounted close to exhaust components or in poorly ventilated engine bays experience accelerated dielectric breakdown of their internal pressure element. Ensuring that heat shielding around the intake manifold area is intact significantly extends sensor service life.
Moisture ingress through the electrical connector is the other major longevity factor. After washing the motorcycle or riding in heavy rain, inspect the map sensor connector for signs of water entry. Apply dielectric grease to the connector pins during any service interval where the sensor is unplugged. This simple precaution prevents the oxidation and pin corrosion that cause the majority of intermittent map sensor electrical faults seen in real workshop environments.
Routine Inspection Intervals and Early Fault Detection
Including the map sensor in routine service inspections — at least once per season for high-mileage motorcycles — allows technicians to catch degradation before it causes noticeable riding symptoms or ECU damage. During each inspection, check the vacuum hose for flexibility and integrity, clean the electrical connector, and verify the reference voltage and output signal with a multimeter. This takes less than ten minutes and provides meaningful insight into sensor health trends.
Using a diagnostic scanner to review live sensor data during regular service appointments is an equally valuable habit. Comparing historical data readings across multiple services allows you to detect gradual output drift before it crosses into fault-code-triggering territory. A map sensor that was reading 1.2 volts at idle six months ago but now consistently reads 0.9 volts under identical conditions is showing a trend that warrants investigation, even if no fault codes have appeared yet.
Proactive maintenance of the map sensor and its supporting hose and wiring circuit is far less costly than addressing the downstream consequences of running an engine on corrupted pressure data. Injector deposits from chronic rich running, piston damage from extended lean operation, and catalytic converter damage from excessive fuel pass-through are all preventable outcomes when sensor integrity is monitored consistently.
FAQ
How do I know if my motorcycle map sensor has completely failed versus just degrading?
A completely failed map sensor typically causes the engine to enter limp-home mode, severely limiting RPM and throttle response, and usually triggers a persistent fault code. A degrading map sensor tends to produce intermittent symptoms — occasional rough idle, sporadic hesitation, or fault codes that appear and disappear — because the sensor still produces a signal but with increasing inaccuracy. Live data monitoring during a warm engine test ride is the most reliable way to distinguish between gradual degradation and total failure, as a failing sensor will show voltage spikes or signal drop-outs that a fully dead sensor would not.
Can I clean a map sensor instead of replacing it?
In some cases, a map sensor that has been contaminated by oil vapor from the intake manifold or crankcase breather system can be carefully cleaned with electronics-safe contact cleaner applied through the pressure port. However, this approach only works when contamination is the cause and the sensor's internal pressure element is still intact. If the sensor has suffered physical damage, internal drift from heat aging, or electronic component degradation, cleaning will not restore accuracy. Given the relatively low cost of a replacement map sensor compared to the cost of incorrect fueling damage, replacement is the more conservative and reliable decision in most diagnostic scenarios.
Will a faulty map sensor always trigger a check engine light?
Not always. The ECU only logs a fault code and illuminates the warning light when the map sensor output falls outside the programmed tolerance window for a defined period. A sensor with minor drift that keeps its output within acceptable boundaries — even if slightly inaccurate — will degrade performance without triggering a code. This is why relying solely on the absence of a check engine light as confirmation of sensor health is unreliable. Regular live data comparison and physical inspection of the vacuum line and connector are necessary to detect sub-threshold degradation that the fault code system does not flag.
How long does a replacement map sensor typically last on a motorcycle?
A quality OEM-grade or OEM-equivalent map sensor installed correctly and maintained properly should last the full service life of the motorcycle under normal conditions. Premature failure is almost always attributable to external factors — heat damage from missing or deteriorated shielding, moisture ingress through a compromised connector, oil contamination from a faulty crankcase ventilation system, or physical damage from vibration if the sensor mounting is loose. Addressing these root causes at the time of replacement, rather than simply swapping the sensor, is the key to achieving durable long-term performance from the new component.