
 EN
EN
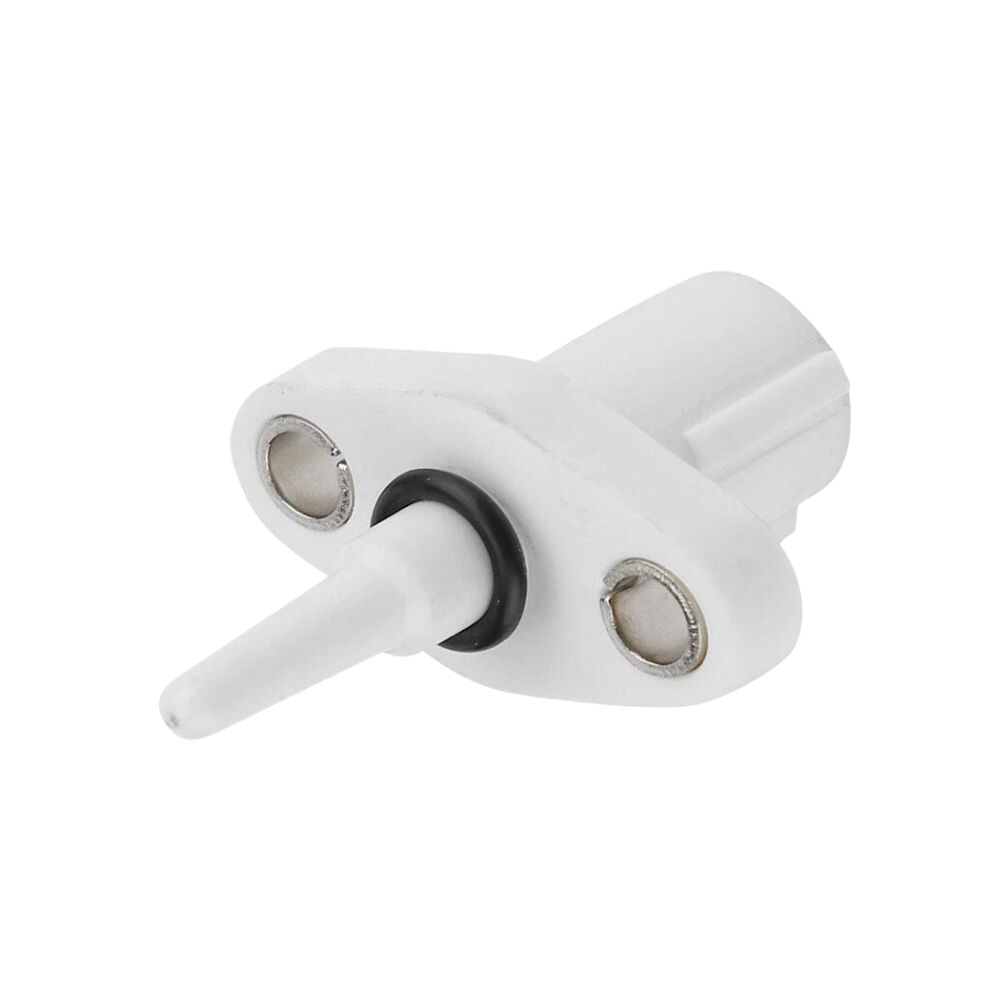
A temperature sensor is one of the most critical components in any engine management system, directly influencing fuel delivery, ignition timing, and overall engine efficiency. Whether fitted to a high-performance motorcycle or an industrial machine, a temperature sensor that is poorly maintained will deliver inaccurate readings, leading to sluggish performance, increased fuel consumption, and potentially serious mechanical damage over time. Understanding how to properly care for this component is not a luxury — it is a fundamental part of responsible vehicle or equipment ownership.
.jpg)
Maintaining a temperature sensor for optimal performance requires a structured approach that covers inspection, cleaning, calibration awareness, and timely replacement. This guide is designed to walk you through each critical step in that process, explaining not only the practical actions you need to take but also the engineering reasons behind them. By the end, you will have a clear, actionable framework that keeps your temperature sensor working accurately across its full service life.
Understanding What a Temperature Sensor Does and Why Maintenance Matters
The Functional Role of a Temperature Sensor in Engine Systems
A temperature sensor measures thermal conditions — typically the temperature of intake air, coolant, or exhaust gases — and transmits this data as an electrical signal to the engine control unit (ECU). The ECU then uses these values to make real-time adjustments to fuel injection volume, ignition timing, and idle speed. This continuous feedback loop is what keeps an engine running efficiently across a wide range of operating conditions.
When a temperature sensor begins to degrade, its resistance characteristics shift, causing the ECU to receive false data. For example, if an air temperature sensor reads the intake air as colder than it actually is, the ECU will enrich the fuel mixture unnecessarily, wasting fuel and increasing emissions. Over time, these small inaccuracies compound into noticeable performance problems that are often misdiagnosed as carburetor or injector faults.
This is why maintenance is not just about cleaning a part — it is about preserving the accuracy of your entire engine management system. A well-maintained temperature sensor keeps every downstream system working as designed, which is the foundation of reliable, efficient engine operation.
Common Causes of Temperature Sensor Degradation
Several factors accelerate the wear and degradation of a temperature sensor. Thermal cycling — repeated heating and cooling — causes the sensor body and its internal resistive element to expand and contract, gradually weakening electrical connections and housing seals. Vibration compounds this effect, particularly in motorcycle applications where engine and road vibration are transmitted directly to sensor mounting points.
Contamination is another leading cause of temperature sensor failure. Oil deposits, carbon buildup, moisture ingress, and corrosive road salts can all coat the sensing element, insulating it from the thermal medium it is supposed to measure. This insulation effect creates a lag in response time and a consistent offset in readings — problems that cannot be corrected by software calibration alone.
Connector corrosion is frequently overlooked as a degradation pathway. The electrical connector that links the temperature sensor to the wiring harness is exposed to moisture and temperature extremes, making it vulnerable to oxidation. Even minor oxidation at the connector pins adds unwanted resistance to the signal circuit, which the ECU may interpret as a temperature change that never actually occurred.
Routine Inspection Practices for a Temperature Sensor
Visual Inspection Protocols
Regular visual inspection is the first line of defense in maintaining a temperature sensor. During every scheduled service interval — or at minimum every 10,000 kilometers in motorcycle applications — the sensor and its immediate environment should be visually examined. Look for signs of cracking in the sensor body, discoloration from excessive heat, and any physical damage to the wiring insulation near the connector.
Pay particular attention to the condition of the sensor's sealing elements. A temperature sensor installed in a coolant passage or intake tract relies on O-rings or thread sealant to prevent fluid ingress. If these seals have hardened, cracked, or begun to extrude, they must be replaced immediately, even if the sensor itself still reads correctly. Fluid intrusion around the sensor base leads to corrosion that will eventually destroy the component from the outside in.
Check the routing of the sensor harness as well. Wiring that has been allowed to contact hot exhaust components, sharp brackets, or rotating parts will deteriorate rapidly. Properly re-routing and securing the harness with appropriate heat-resistant looms is a simple preventive measure that significantly extends the functional life of the temperature sensor.
Electrical Testing Procedures
A multimeter is the essential tool for verifying the electrical health of a temperature sensor. Most sensors of the NTC (Negative Temperature Coefficient) type — which are the most common in motorcycle and automotive applications — exhibit a predictable decrease in resistance as temperature increases. Your service manual will provide a resistance-versus-temperature table specific to your model. Testing the sensor at a known temperature and comparing the measured resistance against this table tells you definitively whether the component is still within specification.
To test the sensor, disconnect the harness connector and measure resistance directly across the sensor terminals using the multimeter's ohms setting. If the sensor body is cold (around 20°C), a typical intake air temperature sensor might show resistance in the range of 2,000 to 3,000 ohms. At operating temperature (around 80°C), that value should drop to approximately 300 to 400 ohms. Any reading that falls significantly outside the specified range indicates a sensor that needs replacement.
Do not overlook the connector itself during electrical testing. Use the millivolt setting on your multimeter to check for voltage drop across the connector under load. A drop greater than 50 millivolts suggests oxidized or corroded pins that are adding resistance to the circuit. Cleaning or replacing the connector resolves this issue and restores signal accuracy without requiring a new temperature sensor.
Cleaning and Environmental Protection of a Temperature Sensor
Safe Cleaning Methods for the Sensor Element and Housing
Cleaning a temperature sensor must be done carefully to avoid damaging the delicate sensing element. The preferred approach is to use an electrical contact cleaner spray, which evaporates quickly and leaves no residue. Apply the spray to the sensing tip and allow it to dissolve any surface contamination before gently wiping with a lint-free cloth. Avoid using wire brushes, abrasive pads, or solvent-soaked rags, as these can abrade the sensing element's surface coating or introduce new contaminants.
For sensors affected by heavy carbon or oil fouling — particularly those located in intake passages — a brief soak in a mild degreaser may be necessary. However, the sensor should never be submerged in solvent, and the connector must be kept completely dry throughout the process. After cleaning, allow the sensor to air dry completely before reinstallation to prevent any moisture from being drawn into the housing when the engine reaches operating temperature.
Once clean, inspect the sensing element under good lighting. The element surface should appear uniform and undamaged. Any visible pitting, flaking, or discoloration that persists after cleaning is evidence of irreversible degradation, and the temperature sensor should be replaced rather than returned to service.
Protecting the Sensor from Environmental Damage
Environmental protection begins with proper installation. A temperature sensor should always be installed with fresh sealing components to the manufacturer's specified torque. Over-tightening can crack the housing or deform the thread, while under-tightening allows fluid or air infiltration that accelerates corrosion. Using a calibrated torque wrench is the only reliable way to achieve the correct installation load.
Applying a thin coat of dielectric grease to the connector pins before reconnection is a highly effective measure against moisture ingress and oxidation. Dielectric grease does not conduct electricity and will not affect signal transmission, but it does create a barrier that prevents water from sitting on the metal contact surfaces. This single step can double or triple the service life of connector pins in vehicles exposed to rain, humidity, or road spray.
In harsh operating environments — salt air coastal regions, winter roads treated with de-icing chemicals, or off-road dusty conditions — more frequent inspection intervals are warranted. A temperature sensor that would last 40,000 kilometers in a temperate, clean environment may need attention at half that mileage under severe conditions. Adjusting your maintenance schedule to reflect real-world operating conditions is a practical, cost-effective approach to sensor longevity.
Knowing When to Replace a Temperature Sensor
Recognizing the Symptoms of a Failing Sensor
Even with diligent maintenance, every temperature sensor has a finite service life. Recognizing the early symptoms of failure allows you to replace the component before it causes secondary damage to the engine or emission control systems. The most telling sign is the appearance of a fault code from the ECU — most modern motorcycles and vehicles store diagnostic trouble codes (DTCs) that point specifically to out-of-range sensor signals or circuit faults in the temperature sensor circuit.
Behavioral symptoms include hard starting in cold conditions, excessive fuel consumption, rough idling, and a general loss of throttle response. These symptoms arise because the ECU is receiving incorrect temperature data and applying inappropriate fuel and timing corrections. Importantly, these same symptoms can mimic other faults, so always confirm the diagnosis with a multimeter test before condemning the temperature sensor.
An intermittent fault — where the problem appears and disappears depending on engine temperature or vibration — is particularly indicative of a sensor with a failing internal connection. Intermittent faults are notoriously difficult to catch during static testing, which is why a thorough inspection of the wiring and connector during a running engine check (using a live data scanner) often reveals the issue more reliably than a cold resistance test alone.
Selecting an Appropriate Replacement Sensor
When the time comes to replace a temperature sensor, specification matching is paramount. The replacement must match the original sensor in terms of thread size, sensing range, resistance curve, and connector type. Installing a sensor with a different resistance characteristic — even if it physically fits — will cause the ECU to apply incorrect corrections, potentially creating worse performance problems than the faulty original part.
For Honda motorcycles such as the CB1000R, CB1100, CBR1000RR, CB650R, CBR600RR, CBR650F, and CBR650R, using a purpose-built air temperature sensor matched to the OEM specification ensures seamless integration with the factory ECU mapping. These high-usage platforms benefit from sensors engineered to the precise resistance tolerances that Honda's fuel injection systems expect, avoiding the calibration drift that can occur with generic aftermarket substitutes.
After installing any replacement temperature sensor, clear stored fault codes using a diagnostic tool and perform a short test ride across the full operating temperature range. Monitor live ECU data if possible to confirm that the sensor's output tracks realistically with actual engine and ambient temperatures. This final verification step closes the loop on the replacement process and confirms the repair was successful.
FAQ
How often should I inspect my temperature sensor?
For most motorcycles and vehicles, inspecting the temperature sensor visually at every scheduled service interval is sufficient under normal conditions. If you operate in harsh environments — involving salt water exposure, extreme dust, or frequent cold starts — inspection every 5,000 kilometers is a more appropriate interval to catch early corrosion or contamination before it becomes a performance issue.
Can a faulty temperature sensor damage my engine?
Yes, indirectly. A malfunctioning temperature sensor that causes the ECU to run an excessively rich fuel mixture over extended periods can wash oil from cylinder walls, accelerate carbon buildup, and increase wear on valve train components. Conversely, a lean condition caused by incorrect sensor data can cause detonation, which damages pistons and bearings. Prompt attention to sensor faults prevents these secondary consequences.
Is it safe to clean a temperature sensor with water?
Water is not recommended for cleaning a temperature sensor. Water can infiltrate micro-gaps in the sensor housing and connector, leading to corrosion of internal components. Always use an appropriate electrical contact cleaner or a mild solvent-based degreaser, and ensure the sensor is completely dry before reinstallation. This approach removes contamination without introducing new moisture-related failure risks.
Does the type of temperature sensor matter for different motorcycle models?
Absolutely. Different motorcycle ECU systems are calibrated to work with sensors that have specific resistance-temperature curves. Installing a temperature sensor designed for one model on a different model — even within the same brand — can result in incorrect fuel mapping and persistent fault codes. Always verify that the replacement sensor matches the exact specification listed in the vehicle's service manual or OEM parts catalog before installation.